FREE Crochet Pattern - Airy Spring Headband or Scarf!

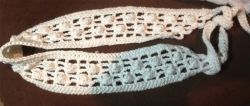
Crochet A Pretty Headband And Scarf That Let You Breathe!
I know I'm in the mood for digging out the spring and summer clothes - maybe you are too! One of my favorite things to wear in the warmer times is a nice headband. But it has to be pretty - and comfortable. I think this one may just fit the bill. I know I'll be wearing it for sure!
Enjoy the free pattern, make lots of them in lots of colors!
Just a note: I made this headband (and the instructions) to fit me. Please follow the instructions below for checking size in case you need to adjust your size up or down. Thanks!
A Warmer Version For Winter...
Try making this in your favorite yarn for a fall/winter scarf!
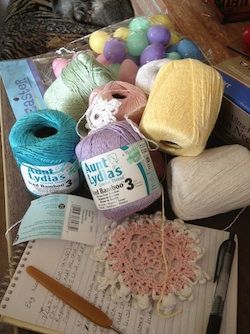
What You Will Need
1 Ball of Aunt Lydia's Iced Bamboo in White or preferred color.
Crochet hook size C
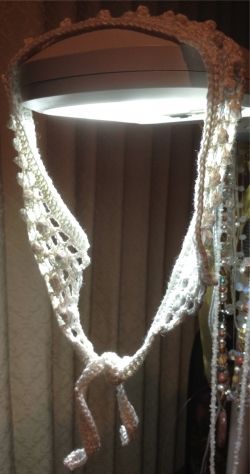
Please ignore the goofy crochet woman and just see how nicely the headband fits:)
How To Make It
Ch 204.
Row 1:
DC in 2nd and in each additional chain across. Fasten off.
Row 2:
Attach thread to 39th DC and CH 2. DC in all DC across, stopping at the 39th DC before end of row. (The 39 DC's on either end are the ties). Ch 6, turn.
Row 3:
*Skip one DC, DC in next DC. Repeat from * across. Ch 6, turn.
Row 4:
*Skip one DC, DC in next DC. Ch 1, work 5-DC Popcorn in ch 2 space. Ch 1, DC in next DC. Repeat * across, Do not work in last square (decrease made). Ch 1, turn.
Row 5:
Sl st over to next DC. Ch 6, DC in next DC. *Ch 2, DC in next DC. Repeat from * across, omitting last square (decrease made). Ch 1, turn,
Row 6:
Slip stitch in space over to next DC. CH 6. *Work DC in next DC. Ch 1, work 5-DC Popcorn in ch 2 space. Ch 1, DC in next DC. CH 2. Repeat * across, Do not work in last square (decrease made). Ch 1, turn.
Row 7-8:
Repeat rows 5 and 6 one time.
Row 9:
Slip stitch in space over to first DC. Ch 2, *Work 2 DC in ch 2 space, DC in next DC. Repeat from * across, omitting last space. Fasten off, weave in ends.
Another Change You Can Make!
If you would rather have the headband with squared off rather than tapered ends, you can do that by omitting all the "omit" instructions. Just continue to the last square of the row in pattern.
This would change instructions for the beginning of rows as well. Basically, what you're doing is one row of solid DC, one row of meshes and popcorns, and another row of just meshes only. If you're not comfortable, don't make the change till you can get advice from someone.
Another Variation - Make It Into A Scarf!
If you continue in pattern, you will eventually come to a point leaving you with a triangular head scarf.
Get The Hooks I Use! - You Will LOVE Them!

What Do You Think Of This Pattern? - Come On, You Can Tell Me!
Are you planning to make this?
A Word About Adjusting Size Of This Pattern
Check the foundation chain to see how it fits your head. Allowing 38 stitches on each end for the ties, and loosely tying them together at the 38th stitch point, slip it over your head and see how it fits. If it's too small or too big, add or subtract 10 chains (per each 1") from beginning chain.

Proud To Be An Associate Professional Member of CGOA
The Crochet Guild of America
All content ©SheilaSchnauzies


