Crochet A Pretty Columbine Potholder! Free Crochet Pattern

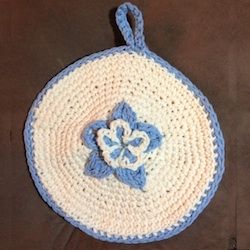
Brighten Your Kitchen With Some Pretty Columbine Flower Potholders!
I just love Columbines! They are such a complex, yet graceful flower. They come in a rainbow of colors, everything from the palest pink or yellow to the deepest purples, some almost black. So whatever colors you choose, you can be fairly sure it exists in nature!
For safety, this potholder is done in 100% Cotton in double thickness.
It seemed to take no time at all to crank out the two plain layers. Then you get to make the fun part, the Columbine applique.
I've rated this pattern Intermediate ability because it utilizes 3D construction methods.
If you belong to a potholder exchange, as I do, this might be a fun pattern to surprise your exchange partner. It's also an excellent way to use up some of that scrap yarn you have tucked away! So, happy crocheting!

What You Will Need
1 ball of Main Color and small amount of contrast color in 100% cotton yarn. I recommend Sugar n' Cream or Peaches n' Creme.
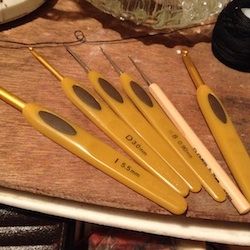
Crochet hook size G or your preferred.
The Schnauzer Difficulty Rating! 3 - Intermediate

A Word About Yarn & Thread Selection...
You may use different yarns such as scrap yarns or threads with good results! Just make sure to keep them similar in weight and thickness so as not to throw off the pattern.
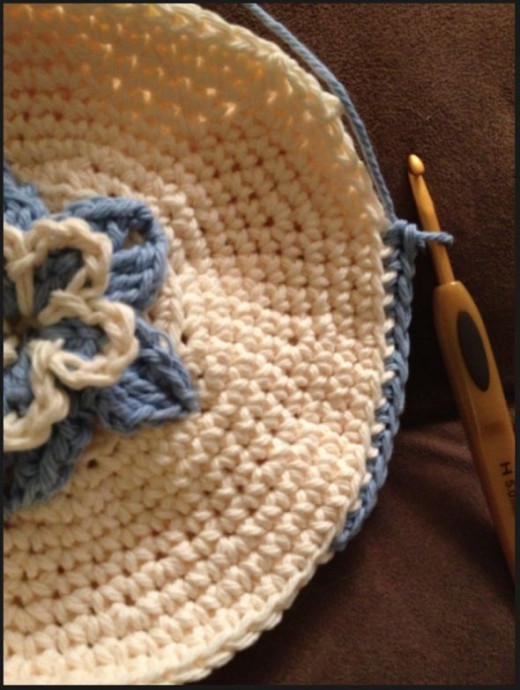
Here's A Bigger Picture To Go By...

Let's Make The Magic!
Pattern and all content SheilaSchnauzies 2013
Please do not distribute this pattern anywhere internet, email, real world or otherwise.
You may sell items made personally by you from this pattern. Thank you!
What You'll Need
1 Ball Sugar n’ Cream Cotton Yarn in main color and small amount in contrast color
Any other worsted weight cotton yarn is fine
Directions – Potholder (Make Two)
CENTER
Ch 4, join with sl st to form ring.
Round 1
Work 9 SC in ring. Sl st to first SC.
Round 2
Ch 1, work 2 SC in each SC around. Sl st to first SC.
Round 3
Ch 1, *SC in next 2 stitches, work 2 SC in next stitch. Repeat from * around, sl st to first SC.
Round 4
Ch 1, work 1 SC in each SC around. Sl st to first SC.
Round 5
Ch 1, *SC in next 3 stitches, work 2 SC in next stitch. Repeat from * around, sl st to first SC.
Rounds 6 & 7
Ch 1, work 1 SC in each SC around. Sl st to first SC.
Round 8
Ch 1, *SC in next 4 stitches, work 2 SC in next stitch. Repeat from * around, sl st to first SC.
Rounds 9 & 10
Ch 1, work 1 SC in each SC around. Sl st to first SC.
Round 11
Ch 1, *SC in next 5 stitches, work 2 SC in next stitch. Repeat from * around, sl st to first SC.
Rounds 12 & 13
Ch 1, work 1 SC in each SC around. Sl st to first SC.
Round 14
Ch 1, *SC in next 6 stitches, work 2 SC in next stitch. Repeat from * around, sl st to first SC.
Round 15
Ch 1, work 1 SC in each SC around. Sl st to first SC.
Round 16
Repeat Round 14
Round 17
Repeat Round 15
Round 18
Repeat Round 14
Round 19
Repeat Round 15
NOTE:
If you prefer your potholder a different size, add or subtract the number of times you repeat Rounds 14 and 15. Note the number of rounds and make your other potholder layer to match.

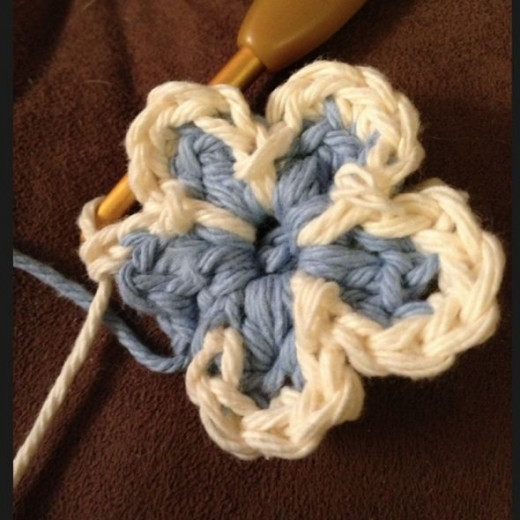
Directions – Columbine Flower
CENTER
Ch 5, join with sl st to form ring.
Round 1/
*Ch 2, DC in ring. Ch 2, slip stitch in ring. Repeat from * around 4 times (5 petals).
Round 2/
*Ch 3, sl st between next two petals, tucking the chain behind the petal as you work. Repeat from * around, ending with ch 3, sl st in base of beginning ch 3. Fasten off.
Round 3/
Attach contrast color to first stitch on right side of any petal with a slip stitch. *Ch 1, SC in all stitches until the last stitch on left side of petal. Slip stitch in that stitch. Ch 1, slip stitch through center hole of flower. Ch 1, sl st in first stitch on right side of petal. Repeat from * around ending with a slip stitch in the first slip stitch of round. Make sure that as you go you don’t totally trap the ch −3 on the back side of flower as you’ll need it after this round. Fasten off.
Round 4/
Attach Main Color in ch-3 space behind any flower petal. *Ch 2, DC in space. TRC, Ch 2, TRC in space. DC in space. Ch 2, slip stitch in space. Ch 1, slip stitch in next ch 3 space. Repeat from * around. End with ch 1, sl st in base of first ch 2. Fasten off leaving about 12-14” of yarn tail.
Attaching Flower
Align center holes of flower and one side of potholder. Draw yarn through point of petal you just completed. *Insert hook from above into point of next petal. Pull yarn through. From underneath, insert hook one stitch adjacent and pull yarn to other side. Repeat from * around until all petal points are fastened down. Finish by making an attachment of the center hole to the potholder. End with yarn on underside with a slip stitch then fasten off.
Attaching Layers
Place potholder layer with flower on top. Place the other layer under it with the right side facing out. Attach Main Color in any SC on outer round. Ch 1, work a single crochet through back loops only on each stitch around. Join with sl st to first SC. Do not fasten off.
Hanging Loop
Ch 12, slip stitch in next stitch on round. Ch 1, turn. Work one SC in each chain. Finish with slip stitch back on outer round. Fasten off, weave in ends.
Great Crochet Accessories From Amazon - My Hand Picks!

Columbine Close Up

What Do You Think Of This Pattern? - Come On, You Can Tell Me!
What Are Your Thoughts On This Pattern?
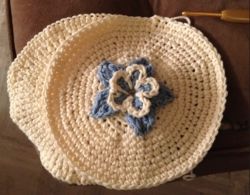
Crocheting The Pieces Together...

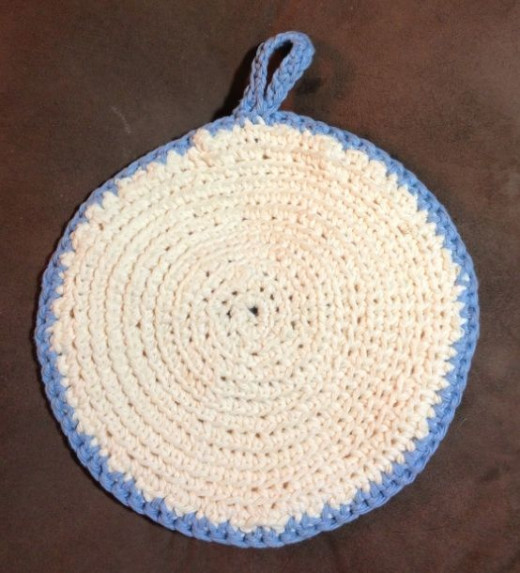
Here's The Back...
Learn Crochet On YouTube - Right Or Left Handed!
A Note From Your Designer...

Hi, I'm SheilaSchnauzies, also published as SheilaSparkles, and my life's passion is designing in Crochet! I also love to share gifts with friends, and this pattern is my gift to you! I give away about 95% of my pattern designs free. The other 5% are sold on my pattern store at Craftsy.com to benefit the vet expenses of my Miniature Schnauzer Rescue, Sheila's Schnauzies.
Just one little favor, please... I would appreciate it if you do not post this pattern anywhere on the Internet or in the 'real world.' Instead, you are most welcome to provide a link to this webpage.
I use a system I call the "Official Schnauzer Difficulty Rating" just for fun, to rate the difficulty of my patterns. If it's a 3/5 or more, I'll explain why I consider it more difficult. A few of my designs use techniques that are a bit unconventional! If it's one of those patterns, I'll warn you ahead of time. I do a lot of custom-fit patterns, for example. They are made to fit YOU, not a measurement from a chart. They're surprisingly easy to do and actually end up fitting. That's a good thing, yes?
So glad you found my patterns! I hope you really enjoy making whatever it is you're making! Crochet hugs, -Sheila
Honored To Be An Associate Professional Member of Crochet Guild of America!

"Crochet thread is the ink with which I will sign my life." –SheilaSchnauzies
All images and content ©SheilaSchnauzies


